
To Install WordPress plugins is only the beginning. You’ll need to learn how to install and activate WP plugins properly to get the most out of your site. Once started, some plugins will add a button in your WordPress admin panel. Clicking this new button will open the related plugin settings page, where you can configure its features further. Other plugins might require you to visit a particular settings page by browsing to a specific URL or clicking on a specific link (e.g., http://example.com/wp-cobvid-plugins). This step-by-step tutorial will show you how to install and activate WordPress plugins correctly to have the optimal effect on your website.
The WordPress admin panel is the control center for all things related to your site’s content management. The admin panel is accessible via a web browser at the URL of your WordPress site (e.g., http://example.com/wp-admin).
Before installing WordPress plugins via the admin panel, you must first log in to this panel. You can do this by clicking on the “Log In” button at the top right corner of the page.
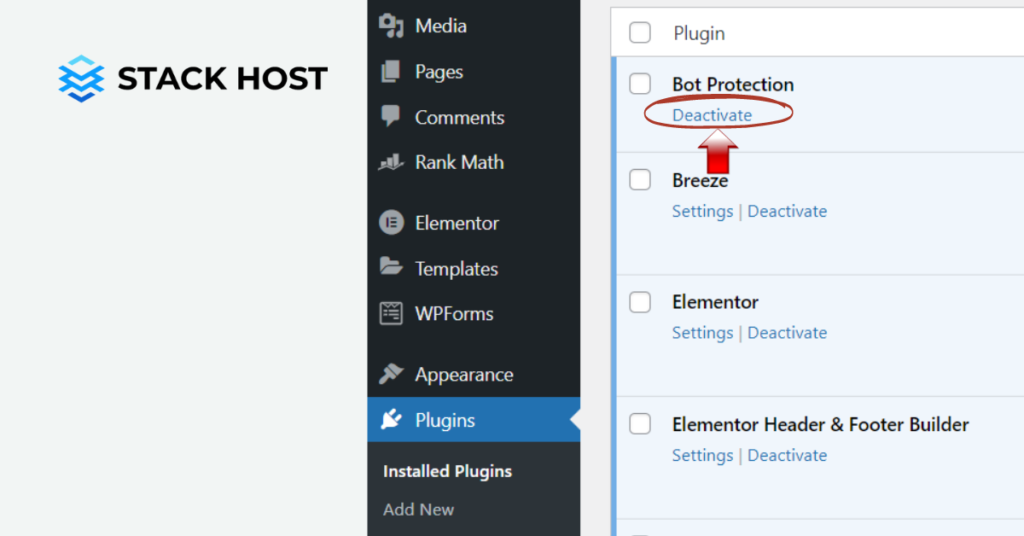
If you are already logged into your WordPress account, you can proceed to install WordPress plugins via the admin panel. When you click on “Plugins” from the left-hand menu, you’ll see a list of all the currently installed plugins on your WordPress site.
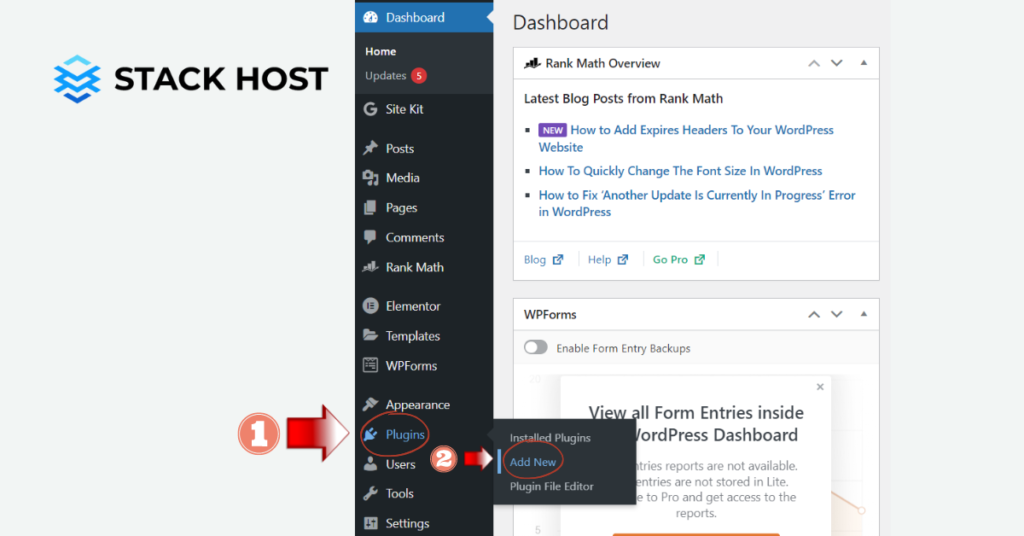
You can also activate and deactivate existing plugins in this list. To download and install new plugins, click “Add New” at the top of the page. You may also notice that the “Upload” link has now been replaced by “Install.” This change was made to make adding new plugins easier.
Suppose you are installing WordPress plugins that are not in the WordPress directory. In that case, you will have to take a few extra steps to install them manually. Most premium plugins can be found in the WordPress directory. Some might be free, while others require a one-time or recurring payment.
To install WordPress plugins manually, you will need to log into your WordPress site and then proceed to the directory where you have downloaded the plugin file. If you downloaded your plugins via FTP, then you can use FileZilla to log into your server.
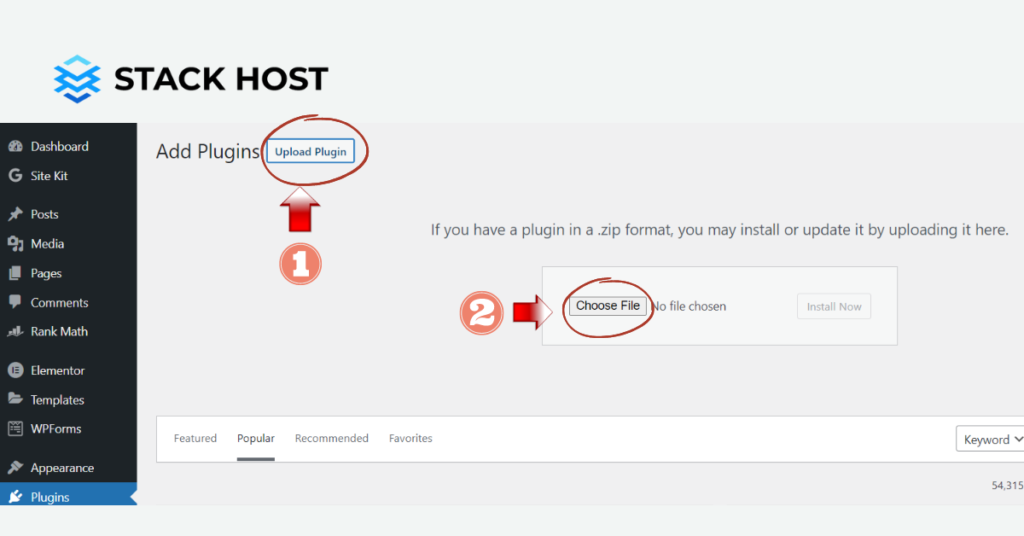
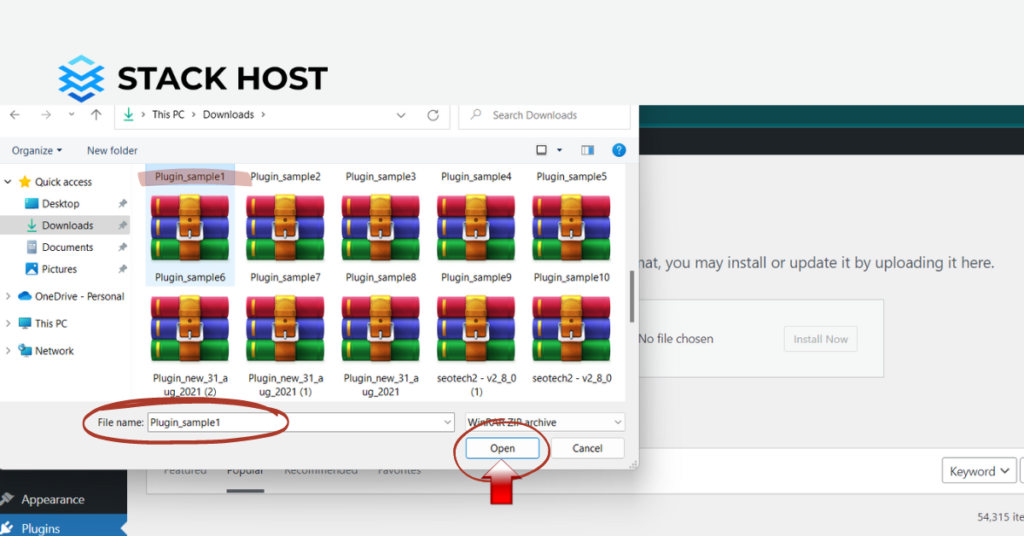
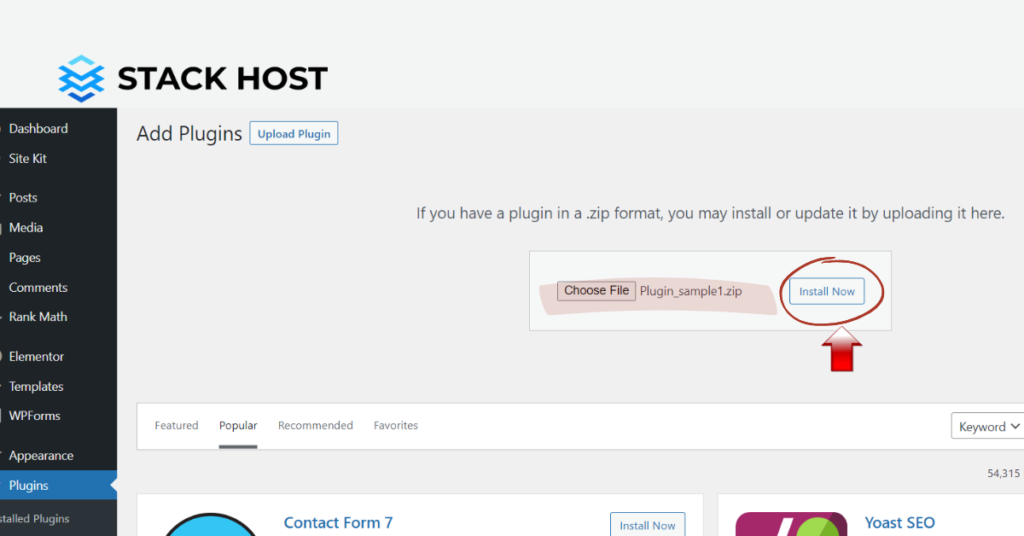
Next, you must upload the plugin file to the “/wp-content/plugins” directory on your server. Now, you have to go to your admin panel and proceed to the “Plugins” section. Click on “Activate” next to the plugin you want to activate. If you get an error message, you might have to log into your server again and ensure that the plugin file is in the “/wp-content/plugins” directory on your server.
Once you have downloaded and installed your new WordPress plugin, it will be marked as “Disabled” by default. This means the plugin is installed but not yet active on your site. The benefit of this is that it allows you to test out the plugin to make sure it doesn’t cause any disruption to your site.
To activate your new plugin, you must proceed to the “Plugins” section of your WordPress admin panel. You should see a list of all the plugins you have installed on your site. Click on the “Activate” button next to the plugin you want to activate. If you get an error about a missing file, then you might have to log into your server again and make sure that the plugin file is in the “/wp-content/plugins” directory on your server.
WordPress plugins are a great way to add new functionality and enhance your website. The WordPress directory is home to thousands of free plugins that can help you with a wide range of tasks like adding a contact form, creating a newsletter signup form, creating a to-do list, and more.
There are also premium plugins that can help you with more advanced functionality. Installing and activating WordPress plugins is only the first step, though. You also need to learn how to install and activate WordPress plugins properly to have the optimal effect on your website.
Do you want to simplify your life and avoid going through this process? Contact Stack Host, and we will do the task for you.
Stack Host is an independent service provider and is not affiliated with WordPress or Shopify.
Copyright © 2025 STACK HOST provides small business web design, SEO, managed hosting, and expert website support. We help you grow your business online with subscription-based plans for WordPress or Shopify.